In this post, we are going to explore how we can deploy a simple Spring Boot application to AWS Elastic Beanstalk. We will explain how to setup an AWS account and provide a step-by-step guide how to deploy to AWS.
1. Introduction
AWS provides numerous services and in the beginning it is difficult to find out where to get started. An easy way to start experimenting with AWS, is to make use of AWS Elastic Beanstalk. Elastic Beanstalk can be seen as an abstraction layer above core AWS services (like Amazon EC2, Amazon Elastic Container Service (Amazon ECS), Auto Scaling, and Elastic Load Balancing). It provisions and operates the infrastructure and manages the application stack for you, in order for you to focus on writing code.
In the next sections, we will show how to setup an AWS account, create a simple Spring Boot application and provide the steps in order to deploy a Spring Boot application to AWS Elastic Beanstalk.
2. Create a Free Tier AWS Account
Before we can deploy or use any of the AWS services, we will need to create an AWS account. Fortunately, we can create a Free Tier account which will allow us to experiment with several AWS services. We click the Create a Free Account button and fill in our email address, a password and an AWS account name.
Next, we fill in our contact information and choose for the Personal account type.
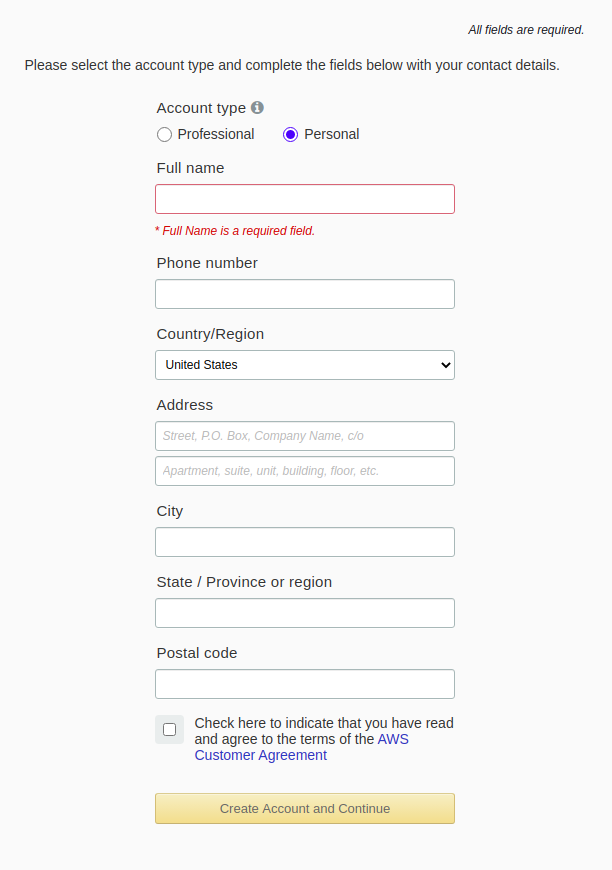
After clicking the Create Account and Continue button, we fill in our credit card details for the identity check and for charging when we use paid services. Do not be afraid, you will not get charged for anything and we will show later on how to set up notifications when a certain budget has been exceeded. This will give you some extra guarantee in order to limit any costs.
We need to verify our phone number and choose to do so by means of a text message.
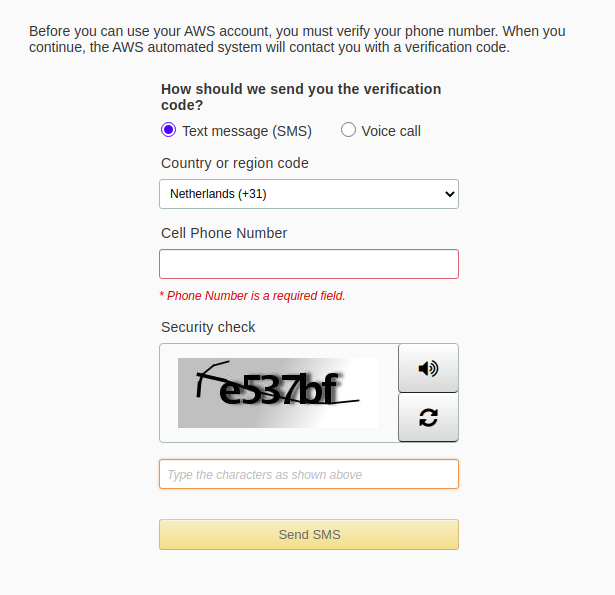
After clicking the Send SMS button, a verification code is received which needs to be entered.
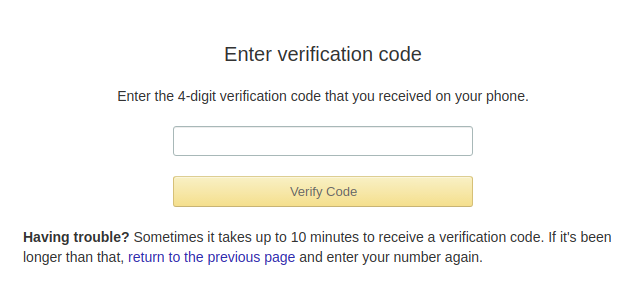
After clicking the Verify Code button, our identify has been verified successfully.
In the next section, we need to choose a support plan. We choose the Basic Plan because we just want to experiment with AWS services.

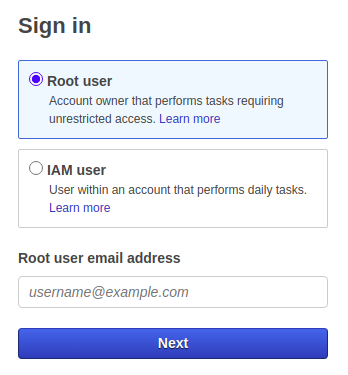
In less than a minute, we receive an email indicating our account being activated. After this point, we can sign in as Root user with the email address and password we have used for creating the account.
After logging in, the Management console is shown.
3. Create IAM User
Using the Root user for your daily access and use of AWS services is not a very good idea. It is therefore advised to follow some best practices. Most of these items are shown when you navigate to the IAM Management Console Dashboard. The Security Status shows which actions need to be performed.

Before we start resolving all of the security issues, we first are going to enable billing information for IAM users. This way, it will be possible to grant IAM users access to the billing information. If you do not do so, you will always need to use the Root user for this and this is what we are trying to avoid.
3.1 Enable Billing Information
Go to your account and choose My Account. Scroll down to the section IAM User and Role Access to Billing Information, click Edit and Activate IAM Access.

3.2 Activate MFA on Your Root Account
Back to the Security Status. First thing to resolve, is to activate Multi Factor Authentication on your Root account. We will do so by means of an Authenticator App on our mobile device.
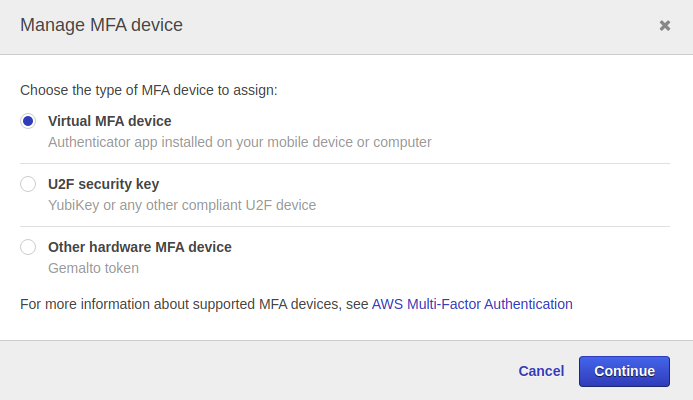
We choose Google Authenticator as Authenticator App for our Android device, but a complete list can be found here.
After scanning a barcode on the Amazon website and entering twice a MFA code, the authentication is set up correctly.
3.3 Create Admin Account
In this section, we are going to set up an Admin account. This way, we do not need to log in anymore with our Root user. Go to My Account and choose My Security Credentials. In the section Access Management, we choose Users and Add a User. Choose a User name and choose AWS Management Console access as Access type.
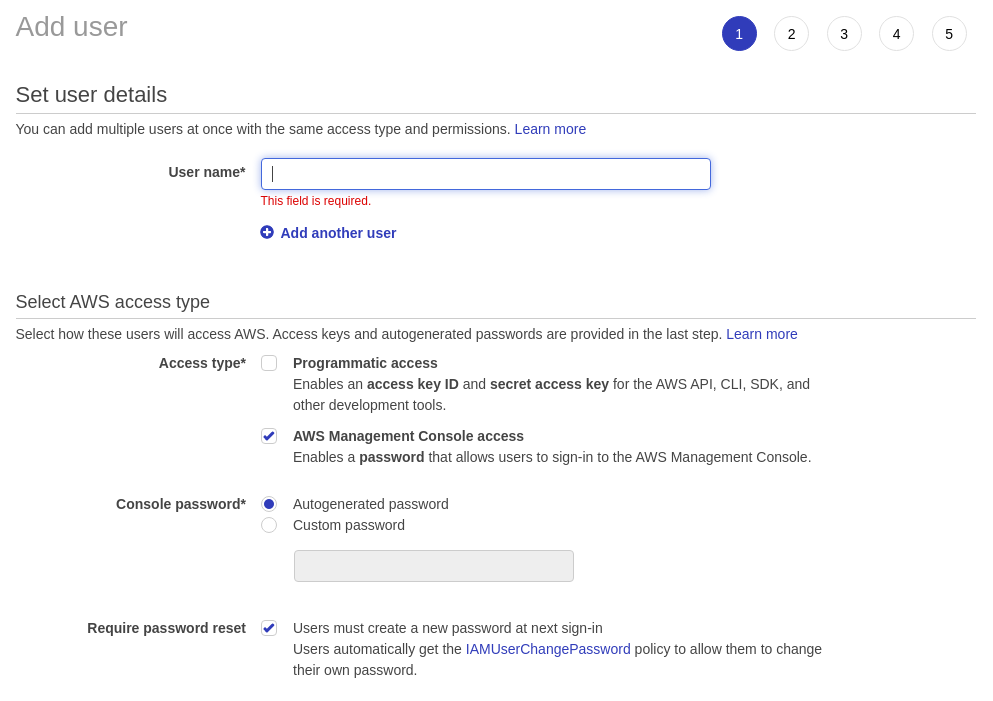
Because we do not have a Group created, we need to create an administrators group with AdministrationAccess in the next step.

After this, a step is shown where we can add Tags, but we just skipped this step. Next, we are presented a Review page where we can review the settings of the user. In a final step, instructions are shown in order to instruct the newly created user.
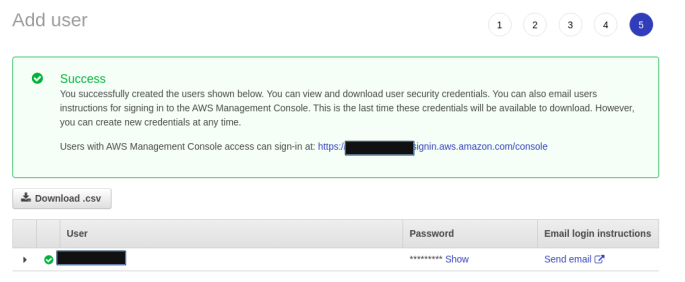
Log out as Root user, navigate to the AWS management console URL as being shown in the instruction page (this will automatically fill in your AWS account Id) and log in as Admin user. At first login, you will need to provide a new password.
3.4 Apply IAM Password Policy
Last thing to do is to Apply an IAM Password policy. After this step, your IAM dashboard will look as follows:

You can now create other groups and other users if you want to.
3.5 Set a Budget
As mentioned earlier, we will set up a notification when a certain amount of money is charged. This can give you some extra comfort when you just want to experiment with AWS services and do not want to be confronted with a high bill. Go to My Account and choose My Billing Dashboard and Budgets. Click the Create a Budget button.

Choose Cost Budget as budget type and click the Set your budget button.

Leave the defaults in this page and only change the budget amount to 1$. Do not forget to set a name also, it is mandatory. The button Configure Alerts will not be enabled before you do so and no indication is given why.

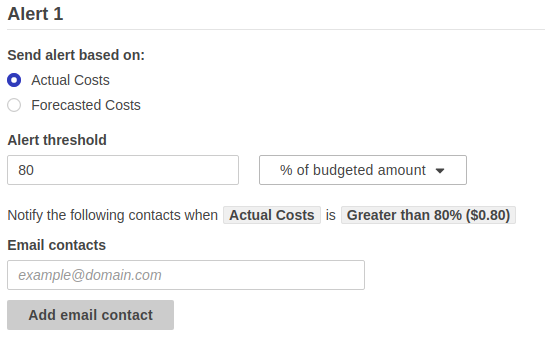
In the Configure Alerts screen, you can set a notification alert. Fill in the email contacts and click Add email contact to add the email addres. When finished, click the Confirm Budget button
After reviewing everything at the Review page, the budget is created. You can create many other budgets if you want to, but for now this will be sufficient.
4. Create a Spring Boot App
Now that we have setup our AWS account, we need to create a simple Spring Boot App. We will create a Spring Web MVC application with a HelloController which just returns a hello message including the IP address.
We go to Spring Initializr, select the Spring Web dependency, use Spring Boot 2.3.4, Java 11 and generate the project. The HelloController looks as follows:
@RestController
public class HelloController {

    @GetMapping("/hello")
    public String hello() {
        String message = "Hello AWS Elastic Beanstalk!";
        try {
            InetAddress ip = InetAddress.getLocalHost();
            message += " From host: " + ip;
        } catch (UnknownHostException e) {
            e.printStackTrace();
        }
        return message;
    }

}
Run the application:
$ mvn spring-boot:run
And invoke the URL:
$ curl http://localhost:8080/hello
Hello AWS Elastic Beanstalk! From host: your-computer-name/127.0.1.1
The sources of this project can be found at GitHub.
5. Install and Configure EB CLI
Before we can start with deploying our application, we need to install and configure the Elastic Beanstalk CLI tool which will allow us to deploy.
5.1 Install EB CLI
The instructions for installing the EB CLI can be found at GitHub. We describe the instructions for Ubuntu 20.04.
First, we clone the git repository:
$ git clone https://github.com/aws/aws-elastic-beanstalk-cli-setup.git
Next, run the installer from the directory where you executed the git clone command:
$ ./aws-elastic-beanstalk-cli-setup/scripts/bundled_installer

==============================================
I. Installing Python
==============================================

*************************************************************
1. Determining whether pyenv is already installed and in PATH
*************************************************************
    - pyenv was not found in PATH.

*********************************************************
2. Determining whether pyenv should be cloned from GitHub
*********************************************************

*********************************************************************************
3. Cloning the pyenv GitHub project located at https://github.com/pyenv/pyenv.git
*********************************************************************************
Cloning into '/home/user/.pyenv-repository'...
remote: Enumerating objects: 18348, done.
remote: Total 18348 (delta 0), reused 0 (delta 0), pack-reused 18348
Receiving objects: 100% (18348/18348), 3.66 MiB | 3.63 MiB/s, done.
Resolving deltas: 100% (12501/12501), done.
Switched to a new branch 'rel-1.2.9'

*******************************************
4. Temporarily export necessary pyenv paths
*******************************************

****************************************************************************
5. Checking whether Python can be downloaded (through curl, wget, or aria2c)
****************************************************************************

************************************************************
6. Installing Python 3.7.2. This step may take a few minutes
************************************************************
Downloading Python-3.7.2.tar.xz...
-> https://www.python.org/ftp/python/3.7.2/Python-3.7.2.tar.xz
Installing Python-3.7.2...

BUILD FAILED (Ubuntu 20.04 using python-build 20180424)

Inspect or clean up the working tree at /tmp/python-build.20201003121924.12884
Results logged to /tmp/python-build.20201003121924.12884.log

Last 10 log lines:
  File "/tmp/tmpx6tk7g8s/pip-18.1-py2.py3-none-any.whl/pip/_internal/cli/main_parser.py", line 12, in <module>
  File "/tmp/tmpx6tk7g8s/pip-18.1-py2.py3-none-any.whl/pip/_internal/commands/__init__.py", line 6, in <module>
  File "/tmp/tmpx6tk7g8s/pip-18.1-py2.py3-none-any.whl/pip/_internal/commands/completion.py", line 6, in <module>
  File "/tmp/tmpx6tk7g8s/pip-18.1-py2.py3-none-any.whl/pip/_internal/cli/base_command.py", line 18, in <module>
  File "/tmp/tmpx6tk7g8s/pip-18.1-py2.py3-none-any.whl/pip/_internal/download.py", line 38, in <module>
  File "/tmp/tmpx6tk7g8s/pip-18.1-py2.py3-none-any.whl/pip/_internal/utils/glibc.py", line 3, in <module>
  File "/tmp/python-build.20201003121924.12884/Python-3.7.2/Lib/ctypes/__init__.py", line 7, in <module>
    from _ctypes import Union, Structure, Array
ModuleNotFoundError: No module named '_ctypes'
make: *** [Makefile:1130: install] Error 1
   Exiting due to failure
The build fails. However, paragraph 2.3 Troubleshooting of the installation instructions gives us the answer. Most problems during installation are due to missing libraries. So we execute the following:
$ sudo apt-get install \
>     build-essential zlib1g-dev libssl-dev libncurses-dev \
>     libffi-dev libsqlite3-dev libreadline-dev libbz2-dev
Then we run the installer again:
$ ./aws-elastic-beanstalk-cli-setup/scripts/bundled_installer
This did the trick, the EB CLI is successfully installed!
Last thing to do is to ensure that the eb command is available in your path.
$ echo 'export PATH="/home/gunter/.ebcli-virtual-env/executables:$PATH"' >> ~/.bash_profile && source ~/.bash_profile
5.2 Configure the EB CLI
Next step is to configure the EB CLI. Navigate to your project directory and run the eb initialisation command:
$ eb init

Select a default region
1) us-east-1 : US East (N. Virginia)
2) us-west-1 : US West (N. California)
3) us-west-2 : US West (Oregon)
4) eu-west-1 : EU (Ireland)
5) eu-central-1 : EU (Frankfurt)
6) ap-south-1 : Asia Pacific (Mumbai)
7) ap-southeast-1 : Asia Pacific (Singapore)
8) ap-southeast-2 : Asia Pacific (Sydney)
9) ap-northeast-1 : Asia Pacific (Tokyo)
10) ap-northeast-2 : Asia Pacific (Seoul)
11) sa-east-1 : South America (Sao Paulo)
12) cn-north-1 : China (Beijing)
13) cn-northwest-1 : China (Ningxia)
14) us-east-2 : US East (Ohio)
15) ca-central-1 : Canada (Central)
16) eu-west-2 : EU (London)
17) eu-west-3 : EU (Paris)
18) eu-north-1 : EU (Stockholm)
19) eu-south-1 : EU (Milano)
20) ap-east-1 : Asia Pacific (Hong Kong)
21) me-south-1 : Middle East (Bahrain)
22) af-south-1 : Africa (Cape Town)
(default is 3): 17
We choose 17 because that is the area we are residing.
In the next step, we need a Security Access key. Go to the AWS Management Console, click My Account – My Security Credentials. We need to create an access key.

Click the Create access key button. In a popup window your Access key ID and Secret access key are shown. This information will be shown only once, so make sure you store it somewhere in a safe place.
Now fill in the Access Key and Secret and continue:
You have not yet set up your credentials or your credentials are incorrect
You must provide your credentials.
(aws-access-id): <fill in your access id>
(aws-secret-key): <fill in your secret key>
Choose an application name,we keep the default and choose Java as platform because we created a Spring Boot jar file.
Enter Application Name
(default is "MyElasticBeanstalkPlanet"):
Application MyElasticBeanstalkPlanet has been created.
Select a platform.
1) .NET Core on Linux
2) .NET on Windows Server
3) Docker
4) GlassFish
5) Go
6) Java
7) Node.js
8) PHP
9) Packer
10) Python
11) Ruby
12) Tomcat
(make a selection): 6
Next, we need to select a platform branch. We are using Java 11 so option 1 is the one we need. Amazon Corretto 11 is a no-cost, multiplatform, production-ready distribution of OpenJDK 11.
Select a platform branch.
1) Corretto 11 running on 64bit Amazon Linux 2
2) Corretto 8 running on 64bit Amazon Linux 2
3) Java 8 running on 64bit Amazon Linux
4) Java 7 running on 64bit Amazon Linux
(default is 1):
Last two questions are answered with no. CodeCommit will store your code in AWS CodeCommit, this will speed up deployments, but for our small example, this is not necessary. The SSH keys are needed when you want to have acces via SSH.
Do you wish to continue with CodeCommit? (Y/n): n
Do you want to set up SSH for your instances?
(Y/n): n
In our repository, a config.yml file is added to directory .elasticbeanstalk with the following contents:
branch-defaults:
  master:
    environment: null
    group_suffix: null
global:
  application_name: MyElasticBeanstalkPlanet
  branch: null
  default_ec2_keyname: null
  default_platform: Corretto 11 running on 64bit Amazon Linux 2
  default_region: eu-west-3
  include_git_submodules: true
  instance_profile: null
  platform_name: null
  platform_version: null
  profile: eb-cli
  repository: null
  sc: git
  workspace_type: Application
The Elastic Beanstalk files are also automatically added to the .gitignore file.
The configuration of EB CLI is ready!
6. Deploy to AWS
A few things are left to do before we can deploy the Spring Boot App to Elastic Beanstalk. The Elastic Beanstalk environments run an nginx instance on port 80 to proxy the actual application, running on port 5000. Therefore, we need to set the server port to port 5000 in the applications.properties file.
server.port=5000
Now build the application which will create the jar file target/MyElasticBeanstalkPlanet-0.0.1-SNAPSHOT.jar:
$ mvn clean install
Next, we need to add the following to the .elasticbeanstalk/config.yml:
deploy:
  artifact: target/MyElasticBeanstalkPlanet-0.0.1-SNAPSHOT.jar
Finally, we are going to create our AWS environment. Do so with the -s option, otherwise a loadbalancer is created which will cost extra. The -s option will create a single instance. Wait a few minutes and the environment will be available.
$ eb create -s
Enter Environment Name
(default is MyElasticBeanstalkPlanet-dev):
Enter DNS CNAME prefix
(default is MyElasticBeanstalkPlanet-dev):

Would you like to enable Spot Fleet requests for this environment? (y/N): N

2.0+ Platforms require a service role. We will attempt to create one for you. You can specify your own role using the --service-role option.
Type "view" to see the policy, or just press ENTER to continue:
Uploading: [##################################################] 100% Done...
Environment details for: MyElasticBeanstalkPlanet-dev
  Application name: MyElasticBeanstalkPlanet
  Region: eu-west-3
  Deployed Version: app-b988-201003_134943
  Environment ID: e-ftvkcpf2zr
  Platform: arn:aws:elasticbeanstalk:eu-west-3::platform/Corretto 11 running on 64bit Amazon Linux 2/3.1.1
  Tier: WebServer-Standard-1.0
  CNAME: MyElasticBeanstalkPlanet-dev.eu-west-3.elasticbeanstalk.com
  Updated: 2020-10-03 11:49:50.471000+00:00
Printing Status:
2020-10-03 11:49:49    INFO    createEnvironment is starting.
2020-10-03 11:49:50    INFO    Using elasticbeanstalk-eu-west-3-093997425909 as Amazon S3 storage bucket for environment data.
2020-10-03 11:50:15    INFO    Created security group named: awseb-e-ftvkcpf2zr-stack-AWSEBSecurityGroup-B7WZ79XCRAGR
2020-10-03 11:50:30    INFO    Created EIP: 15.236.185.10
2020-10-03 11:51:32    INFO    Waiting for EC2 instances to launch. This may take a few minutes.
2020-10-03 11:52:09    INFO    Instance deployment successfully generated a 'Procfile'.
2020-10-03 11:52:09    INFO    Instance deployment successfully detected a JAR file in your source bundle.
2020-10-03 11:52:12    INFO    Instance deployment completed successfully.
2020-10-03 11:52:28    INFO    Application available at MyElasticBeanstalkPlanet-dev.eu-west-3.elasticbeanstalk.com.
2020-10-03 11:52:28    INFO    Successfully launched environment: MyElasticBeanstalkPlanet-dev
Lets check whether we can access our application (the URL is taken from the last but one log line):
$ curl http://MyElasticBeanstalkPlanet-dev.eu-west-3.elasticbeanstalk.com:80/hello
Hello AWS Elastic Beanstalk! From host: ip-172-31-47-35.eu-west-3.compute.internal/172.31.47.35
With the command eb console the console of your environment can be viewed. Just try it out and navigate the pages. Quite some information about your running application is available.
What if we want to change something and want to redeploy our application? This is quite simple. Let’s make a small change to the hello message and add the word again to the text to be displayed:
String message = "Hello again AWS Elastic Beanstalk!";
Rebuild the application with mvn clean install and execute the eb deploy command in order to deploy the application:
$ eb deploy
Uploading: [##################################################] 100% Done...
2020-10-03 12:10:10    INFO    Environment update is starting.
2020-10-03 12:10:14    INFO    Deploying new version to instance(s).
2020-10-03 12:10:17    INFO    Instance deployment successfully detected a JAR file in your source bundle.
2020-10-03 12:10:17    INFO    Instance deployment successfully generated a 'Procfile'.
2020-10-03 12:10:20    INFO    Instance deployment completed successfully.
2020-10-03 12:10:27    INFO    New application version was deployed to running EC2 instances.
2020-10-03 12:10:27    INFO    Environment update completed successfully.
Run the curl command again and the updated message is returned:
$ curl http://MyElasticBeanstalkPlanet-dev.eu-west-3.elasticbeanstalk.com:80/hello
Hello again AWS Elastic Beanstalk! From host: ip-172-31-47-35.eu-west-3.compute.internal/172.31.47.35
7. Terminate the environment
At the end, it is wise to remove the environment. This can be done with the eb terminate command following the environment name. After a few minutes, the environment is gone.
$ eb terminate MyElasticBeanstalkPlanet-dev
The environment "MyElasticBeanstalkPlanet-dev" and all associated instances will be terminated.
To confirm, type the environment name: MyElasticBeanstalkPlanet-dev
2020-10-03 12:12:52    INFO    terminateEnvironment is starting.
2020-10-03 12:13:09    INFO    Waiting for EC2 instances to terminate. This may take a few minutes.
2020-10-03 12:14:40    INFO    Deleted security group named: awseb-e-ftvkcpf2zr-stack-AWSEBSecurityGroup-B7WZ79XCRAGR
2020-10-03 12:14:56    INFO    Deleted EIP: 15.236.185.10
2020-10-03 12:14:58    INFO    Deleting SNS topic for environment MyElasticBeanstalkPlanet-dev.
2020-10-03 12:14:59    INFO    terminateEnvironment completed successfully.
8. Conclusion
It takes some time in order to setup your AWS account properly but this is something you need to do only once. After this, creating an environment for deploying your Spring Boot application is pretty easy and (re)deployments can be executed by means of single command.


Thank you very much. Very helpful
LikeLiked by 1 person
You are welcome, thanks for the nice comment 🙂
LikeLike