
In this blog, it is explained how to configure Jenkins Multibranch Pipelines when using Git LFS. This seems to be a non-issue at first sight, but the documentation is quite dispersed and no clear steps can be found how to configure this. Also, a troubleshooting section can be found at the end of the blog.
1. Introduction
When trying to configure Jenkins Multibranch Pipelines in combination with Git LFS, numerous problems were encountered. No clear instructions could be found in the documentation and also Stack Overflow could not provide the answer. The error messages were also not given a clear description of what was wrong. In the end, I decided to create a sandbox environment running Jenkins from a local Docker container in combination with a GitLab Cloud Git repository. Eventually, ran into the same problems but I was able to find out which configuration was wrong. This blog consists of the following sections:
- Set up a local Jenkins Docker environment;
- Create a Git repository in GitLab Cloud containing a Git LFS file;
- A step-by-step guide how to configure the Jenkins Multibranch Pipeline;
- A troubleshooting section.
The sources being used in this post are available at GitHub.
2. Setup Jenkins
You can skip this section when you have already a running Jenkins environment. If not, you can easily setup a local Jenkins Docker environment. Just follow the instructions from a previous post starting from paragraph 2 up and including paragraph 4.2. Take into account the following changes to the instructions:
- Paragraph 4.1:
- Download the Java JDK from the Adoptium website;
- Global Tool Configuration, use the following settings:
- JDK Name: JDK11
- Download URL for binary archive: file:/var/jenkins_home/downloads/OpenJDK11U-jdk_x64_linux_hotspot_11.0.13_8.tar.gz
- Subdirectory of extracted archive: jdk-11.0.13+8
- It is not necessary to set the JAVA_HOME environment variable
- Paragraph 4.2:
That’s it for the basic setup of Jenkins.
3. Setup Git LFS Repository
When you want to know more about Git LFS, a previous post can be helpful. For the remainder of this blog, it is assumed that you know what Git LFS is. You will make use of GitLab Cloud for storing the remote repository. The reason is that GitLab Cloud offers free unlimited private repositories and that is part of the use case in this blog. When you do not have an account yet, you can create one at gitlab.com.
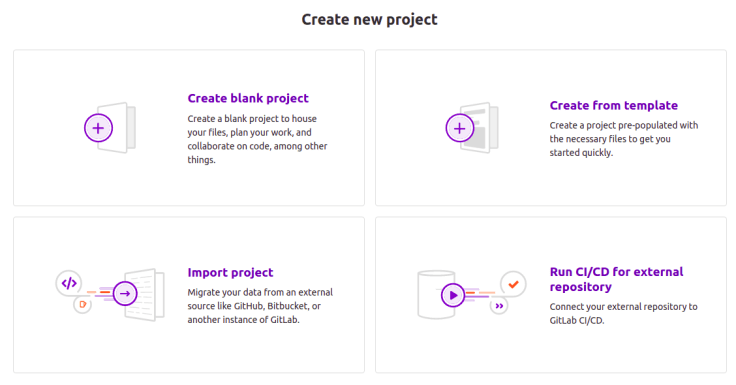
Create a new project and choose for Create blank project.
Give the project the name MyJenkinsGitLFSPlanet and click the Create project button.
Next step, is to add an SSH key to your account. If you do not yet have an SSH key, then create one with the following command:
$ ssh-keygen
When you have chosen to use the default settings, then in your home directory an .ssh directory is present with files id_rsa and id_rsa.pub. The file id_rsa contains the private key and you should never share this one with anybody else than yourself.
Navigate to your account Preferences to the SSH Keys section and add the public key from the id_rsa.pub file as SSH key.
Navigate to the project and copy the SSH url from Clone with SSH.

From this point on, you can choose to follow the instructions how to setup the repository with Git LFS or you can clone the repository from GitHub and just push the repository to GitLab. In the latter case, continue with the next paragraph.
Clone the repository to your local machine.
$ git clone git@gitlab.com:<username>/myjenkinsgitlfsplanet.git
Navigate to start.spring.io and create a basic application and copy the files into the local repository. Add the files to git, commit and push the files.
$ git add .gitignore
$ git add pom.xml
$ git add src/
$ git commit -m "initial commit"
$ git push origin
First verify whether you have Git LFS installed on your local machine. If not, follow the installation instructions.
$ git lfs --version
git-lfs/2.9.2 (GitHub; linux amd64; go 1.13.5)
Enable Git LFS in the repository.
$ git lfs install
Updated git hooks.
Git LFS initialized.
Add an Excelsheet in directory lfs and execute the following command from the root of the repository in order to track Excel files with Git LFS. This will create a .gitattributes file.
$ git lfs track "*.xlsx"
Tracking "*.xlsx"
Add, commit and push the Excel file and the .gitattributes file.
$ git add lfs/
$ git add .gitattributes
$ git commit -m "Add Excel LFS file"
$ git push origin
Navigate in GitLab to the Excel file and you will notice that it has a label LFS next to the file name. This indicates that the file is tracked by Git LFS.

4. Multibranch Pipeline With Git LFS
In this section, you will create the Jenkins Multibranch Pipeline wit Git LFS support.
4.1 Access To GitLab
First, the authentication from Jenkins to the GitLab server must be created. You will do so by means of an SSH key again. Create again an SSH key, but this time do not use the default path to save the SSH key, otherwise your own SSH key will be overwritten. The purpose of this SSH key will be to use it within Jenkins.
Navigate in GitLab to the project and choose Settings – Repository in the left menu. Scroll down to the Deploy Keys section and add the public SSH key you just created. Click the Add key button.

Navigate in Jenkins to Manage Jenkins – Manage Credentials. Click the Jenkins link in the Stores section.

Click the Global credentials (unrestricted) link.

In the left menu, click the Add Credentials link. Choose SSH Username with private key as Kind. Fill GitLab as ID and add the private key in the Key field by clicking the Add button. Finally, click the OK button. This time it is ok to add the private key, because it is a private key for the Jenkins instance and it is stored in a safe place.

4.2 Jenkins Git Client
It is important that the Git Command Line tool is used which is installed at the Jenkins server. Verify this via Manage Jenkins – Global Tool Configuration. Navigate to the Git section and verify that an entry is available for Git CLI.

Besides that, it is also important that Git LFS is installed and initialized for the user running Jenkins. The Docker container used in this blog already has Git LFS installed. This can be verified by executing the following command:
$ docker exec -it myjenkins git lfs --version
git-lfs/2.13.3 (GitHub; linux amd64; go 1.16.2; git a5e65851)
But, Git LFS needs to be initialized for the Jenkins user, so execute the following command in order to do so.
$ docker exec -it myjenkins git lfs install
Git LFS initialized.
4.3 Create Jenkinsfile
In order to create a pipeline in Jenkins, it is necessary to create a Jenkinsfile. Add the Jenkinsfile to the root of the Git repository.
The Jenkinsfile consists out of some basic stages:
- Disable the default checkout of the pipeline. This is necessary in order to do the checkout in a separate step where you can set the necessary properties.
- Cleanup: clean the workspace.
- Checkout: The checkout of the Git repository, this will be more explained in this paragraph.
- Build: Build the basic Spring Boot application.
The most important stage is the Checkout stage. It is important to add the following extensions in order to have a proper Git LFS checkout:
- GitLFSPull: This property is necessary for a proper Git LFS checkout.
- gitTool: ‘git’: This should ressemble with the name defined in Manage Jenkins – Global Tool Configuration. With this extension, you reassure that the Git CLI will be used for the checkout.
pipeline {
    agent any
    options {
        skipDefaultCheckout(true)
    }

    stages {

        stage('Cleanup') {
            steps {
                // Clean workspace before build
                cleanWs()
            }
        }

        stage('Checkout') {
            steps {
                script {
                    def gitRemoteOriginUrl = scm.getUserRemoteConfigs()[0].getUrl()
                    echo 'The remote URL is ' + gitRemoteOriginUrl
                    scmVars = checkout([$class: 'GitSCM', branches: [[name: 'refs/heads/$BRANCH_NAME']], extensions: [[$class: 'GitLFSPull'],[$class: 'LocalBranch', localBranch: '**']], gitTool: 'git', userRemoteConfigs: [[credentialsId: "GitLab", url: gitRemoteOriginUrl]]])
                }
            }
        }

        stage('Build') {
            steps {
                withMaven(jdk: 'JDK11', maven: 'Maven-3.8.4') {
                    sh "mvn clean verify"
                }
            }
        }

    }

}
Commit and push the Jenkinsfile.
4.4 Create Multibranch Pipeline
Navigate to Manage Jenkins – Manage Plugins and install the Pipeline Maven Integration plugin. This is necessary to be able to use the withMaven command in the Jenkinsfile.
Navigate to the homepage of Jenkins and choose New Item. Give the pipeline the name MyJenkinsGitLFS and choose Multibranch Pipeline. Click the OK button.

In the Branch Sources section choose Add source and choose Git.
Copy the SSH URL of the Git repository In Project Repository.
Choose the jenkins credentials.
In the Behaviours section add Git LFS pull after checkout.

Leave the other options as default and click the Save button.
The pipeline runs automatically and the build is successful. Click the build and click Workspaces in the left menu.

Navigate to the directory in the workspace until you reach the Excel file. As can be seen, the Excel is available in the repository and has a size of 4.23 KB.

When Git LFS is not successfully configured, the Excel file is just a simple text file containing the LFS pointer and has a size of 129 B.
5. Troubleshooting
5.1 JGit
JGit is a Git installation in Jenkins often used by plugins. You can also use JGit as your default Git client. However, JGit cannot be used when using Git LFS. When using JGit instead of Git CLI in combination with the Git LFS Pull after checkout extension in the Multibranch configuration and in the Jenkinsfile, the build log will show the following:
Enabling Git LFS pull
[WARNING] JGit doesn't support LFS checkout. This flag is ignored.
5.2 Permission Denied Error
The most confusing error is the one described here. This was the root cause for writing this blog because the error you receive is quite confusing. When you remove the GitLFSPull extension from the Jenkinsfile, a Permission denied error is thrown. This occurs with JGit and also with Git CLI.
org.eclipse.jgit.api.errors.FilterFailedException: Execution of filter command 'git-lfs smudge -- 'lfs/ExcelWorkbook.xlsx'' on file 'lfs/ExcelWorkbook.xlsx' failed with return code '2', message on stderr: 'Downloading lfs/ExcelWorkbook.xlsx (4.3 KB)
Error downloading object: lfs/ExcelWorkbook.xlsx (05bae05): Smudge error: Error downloading lfs/ExcelWorkbook.xlsx (05bae0572f54830f464a9380c09339faaf66af74a7abeb0862f264fb3c2464a5): batch request: git@gitlab.com: Permission denied (publickey,keyboard-interactive).: exit status 255

Errors logged to /var/jenkins_home/workspace/MyJenkinsGitLFS_main/.git/lfs/logs/20211030T123411.01767206.log
Use `git lfs logs last` to view the log.
'
	at org.eclipse.jgit.dircache.DirCacheCheckout.runExternalFilterCommand(DirCacheCheckout.java:1615)
Caused: java.io.IOException
	at org.eclipse.jgit.dircache.DirCacheCheckout.runExternalFilterCommand(DirCacheCheckout.java:1612)
	at org.eclipse.jgit.dircache.DirCacheCheckout.getContent(DirCacheCheckout.java:1577)
	at org.eclipse.jgit.dircache.DirCacheCheckout.checkoutEntry(DirCacheCheckout.java:1487)
	at org.eclipse.jgit.dircache.DirCacheCheckout.doCheckout(DirCacheCheckout.java:563)
	at org.eclipse.jgit.dircache.DirCacheCheckout.checkout(DirCacheCheckout.java:467)
	at org.eclipse.jgit.api.CheckoutCommand.call(CheckoutCommand.java:248)
Caused: org.eclipse.jgit.api.errors.JGitInternalException: org.eclipse.jgit.api.errors.FilterFailedException: Execution of filter command 'git-lfs smudge -- 'lfs/ExcelWorkbook.xlsx'' on file 'lfs/ExcelWorkbook.xlsx' failed with return code '2', message on stderr: 'Downloading lfs/ExcelWorkbook.xlsx (4.3 KB)
Error downloading object: lfs/ExcelWorkbook.xlsx (05bae05): Smudge error: Error downloading lfs/ExcelWorkbook.xlsx (05bae0572f54830f464a9380c09339faaf66af74a7abeb0862f264fb3c2464a5): batch request: git@gitlab.com: Permission denied (publickey,keyboard-interactive).: exit status 255

Errors logged to /var/jenkins_home/workspace/MyJenkinsGitLFS_main/.git/lfs/logs/20211030T123411.01767206.log
Use `git lfs logs last` to view the log.
'
	at org.eclipse.jgit.api.CheckoutCommand.call(CheckoutCommand.java:307)
	at org.jenkinsci.plugins.gitclient.JGitAPIImpl.doCheckoutWithResetAndRetry(JGitAPIImpl.java:353)
	at org.jenkinsci.plugins.gitclient.JGitAPIImpl.doCheckoutWithResetAndRetryAndCleanBranch(JGitAPIImpl.java:434)
	at org.jenkinsci.plugins.gitclient.JGitAPIImpl.access$200(JGitAPIImpl.java:136)
	at org.jenkinsci.plugins.gitclient.JGitAPIImpl$1.execute(JGitAPIImpl.java:314)
	at hudson.plugins.git.GitSCM.checkout(GitSCM.java:1352)
	at org.jenkinsci.plugins.workflow.steps.scm.SCMStep.checkout(SCMStep.java:129)
	at org.jenkinsci.plugins.workflow.steps.scm.SCMStep$StepExecutionImpl.run(SCMStep.java:97)
	at org.jenkinsci.plugins.workflow.steps.scm.SCMStep$StepExecutionImpl.run(SCMStep.java:84)
	at org.jenkinsci.plugins.workflow.steps.SynchronousNonBlockingStepExecution.lambda$start$0(SynchronousNonBlockingStepExecution.java:47)
	at java.base/java.util.concurrent.Executors$RunnableAdapter.call(Executors.java:515)
	at java.base/java.util.concurrent.FutureTask.run(FutureTask.java:264)
	at java.base/java.util.concurrent.ThreadPoolExecutor.runWorker(ThreadPoolExecutor.java:1128)
	at java.base/java.util.concurrent.ThreadPoolExecutor$Worker.run(ThreadPoolExecutor.java:628)
	at java.base/java.lang.Thread.run(Thread.java:829)
Finished: FAILURE
The problem with this error message is that you start looking at problems in the credentials, access to GitLab, etc. But the real error is a missing configuration.
6. Conclusion
Configuring Git LFS in combination with Jenkins Multibranch Pipelines has caused me some headaches. I hope this blog will help others to save time and to have an overview of how to configure Git LFS.
Discover more from My Developer Planet
Subscribe to get the latest posts sent to your email.
Hi there,
thanks very much for this tutorial, it really helped me a lot! I was trying to make this work with the gitea plugin (I somewhat managed to do that). But there are two things I still don’t get: Why do I add the “Git LFS Pull after Checkout” step to my behaviours? Isn’t this what we did manually in the Jenkinsfile. Not to speak of, that when I actually add that, I can’t save the configuration (but that seems to be a different problem).
Even with your Jenkinsfile the ifs didn’t get pulled. After trying around some time I added the sh command “git lfs pull origin” manually as a step. Then the console log shows, that git lfs is not installed. (It is installed in the git repo for sure with .gitattributes and everything). After adding git lfs install and git lfs pull origin all lfs files are pulled but I don’t understand why that step is necessary.
Would be great if you could explain that very quickly.
Thanks in advance!
Best, Rincewind
“Why do I add the “Git LFS Pull after Checkout” step to my behaviours? Isn’t this what we did manually in the Jenkinsfile.”
Good question. I do not know, but otherwise it just does not work.
Did you execute ‘git lfs install’ onto the server where Jenkins executes your builds? This is really necessary and after that, it should not be necessary to add a sh command.
Although this does not answer all of your questions, I do hope this helps.
Good luck!
Oh, your tip with lfs install made my day!! I’d never imagined this being required only once. I removed this step from the Jenkinsfile and it still does work as you said. The Git LFS Pull after checkout stuff is still not in my configuration so seems like it’s not entirely necessary.
“The problem with this error message is that you start looking at problems in the credentials, access to GitLab, etc. But the real error is a missing configuration.”
Which missing configuration? I’m trying to remove the “[$class: ‘GitLFSPull’]” extension so that I can, later, selectively pull the LFS files I want instead of all of them. I’m running into the same issue described in “5.2 Permission Denied Error”.
Thanks!
Exactly what you write: if you do not add the [$class:’GitLFSPull’] extension to the jenkinsfile, you will get the permission denied error.
I do not quite understand what you are trying to achieve with ‘selectively pull the LFS files’. Git will not pull all LFS files from the history to your clone but only the ones that are needed.
Thanks for your answer, I’ll try to be more precise.
What I meant is that for my use-case I do not want to download the large files through the Jenkins “checkout”, because there are 10Go of files and I don’t need 99% of them. For this reason I’m trying to remove [$class:’GitLFSPull’] from the “checkout” command.
Then, later down in the Jenkinsfile, I run a custom script that does “git lfs pull –include file/paths” and only pulls the large files that apply to my platform.
Ok, now I understand. I really do not know whether this is possible in a Jenkins pipeline.
For whoever runs into this issue in the future, I finally found the solution. The secret lies in avoiding git from downloading the large files when doing the regular `clone` (somehow when `git-lfs` is installed Jenkins defaults to trying to download large files even when removing the LFS extension from checkout).
Here are the the configurations that need to be applied for this whole thing to work:
// 1. Set this as environment in Jenkinsfile
GIT_LFS_SKIP_SMUDGE = 1
// 2. Set this before the “checkout” method in Jenkinsfile
git config –global filter.lfs.smudge “git-lfs smudge –skip — %f”
git config –global filter.lfs.process “git-lfs filter-process –skip”
// 3. Do not use the “GitLFSPull” extension