
In this blog, you will learn how to configure an AWS API Gateway backed by an AWS Java Lambda. Next, you will learn how to secure the API by means of an AWS Cognito User Pool. Enjoy!
1. Introduction
AWS API Gateway is a managed service which allows you to manage your API. It has many features available like creating the API, publishing it, securing it, versioning it, etc. Some of the features will be covered in this blog, but certainly not all of them.
AWS Cognito allows you to add authentication to your API. Cognito will be used in this blog to secure your API.
As a prerequisite for following this blog, you will need three AWS lambda aliases. This can be accomplished by following a previous blog. The jar-files for the lambda are available at GitHub. Assuming that you use these jar-files, your starting position is:
- Lambda alias PROD pointing to version v1.0;
- Lambda alias TEST pointing to version v2.0;
- Lambda alias DEV pointing to version v3.0.
First, you will configure the API Gateway without authentication, secondly, authentication by means of Cognito will be added.
2. Create API Gateway
The first setup you will create is visualized in the figure below.
- A client sends a request to the REST API configured in the API Gateway;
- The API Gateway sends the request to the lambda function;
- The lambda function executes and sends its response to the API Gateway;
- The API Gateway sends the response to the client.

In this setup, not authentication is needed to access the REST API.
2.1 Create API
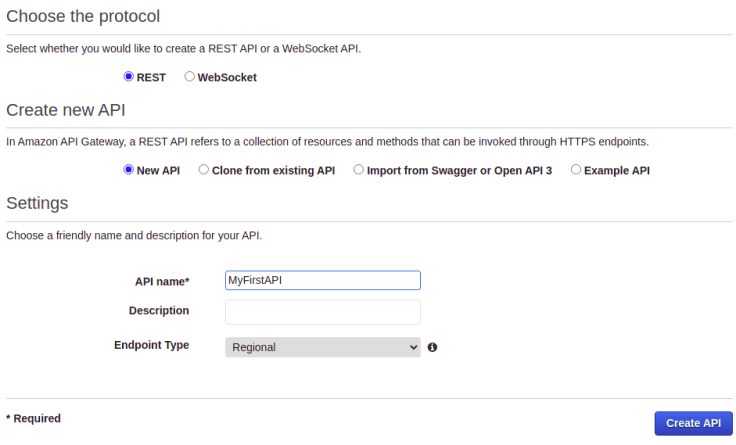
Navigate to the API Gateway service and click the Create API button. You will create a REST API thus click the Build button.

Leave the defaults and choose MyFirstAPI as API name. Click the Create API button.
You now have an empty API created.
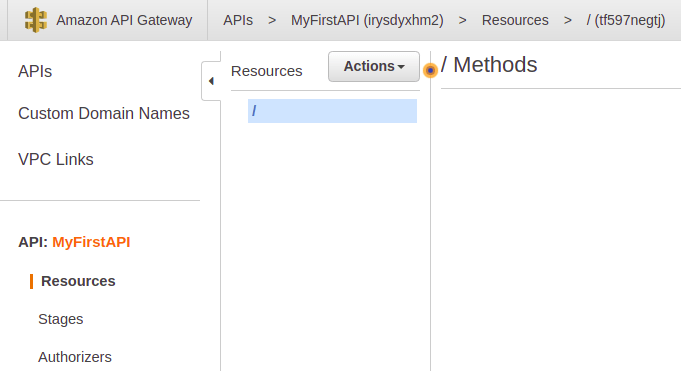
2.2 Create Resource
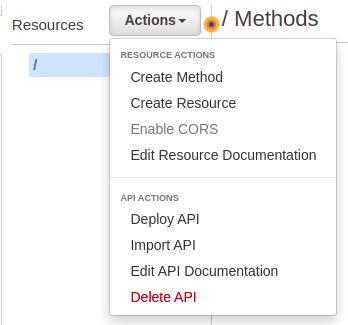
Choose in the Actions menu for Create resource. This will allow you to create a child resource in your API.
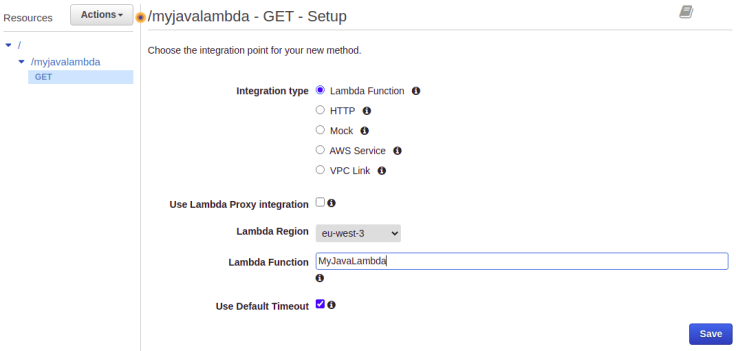
Give the resource the name myjavalambda and click the Create Resource button.

Via the Actions menu, choose Create Method and choose for a GET method. Next, enter the lambda function name MyJavaLambda in the Lambda Function field and click the Save button.
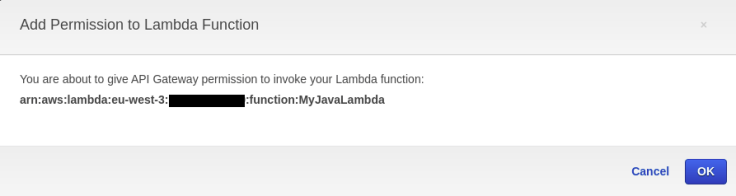
A popup window is shown for granting the API Gateway the permission to invoke your lambda function. Click the OK button in order to do so.
The API with a GET method is now created. Click the TEST button in order to verify that the API works. The response "Version 3" is returned.

When you navigate to the lambda definition, you will notice that the API Gateway is added as a trigger for the lambda function.

2.3 Create Stage Variable
When you invoke the lambda, you always get the development lambda version returned. However, you did create aliases for DEV, TEST, PROD. You can create different stages of your API for invoking each alias. You will do so by means of a stage variable. Click the Integration Request link in the GET – Method Execution screen. Add the text :${stageVariables.lambdaAlias} to the lambda function name.

Clicking the v-icon will show a popup for executing a CLI command for adding the necessary permissions to your lambda function. Execute the CLI command where you replace ${stageVariables.lambdaAlias} with each alias (DEV, TEST, PROD).

When you want to test the GET method, you will notice that an extra field is available in order to enter the lambda alias (it might be that you need to refresh the page in order to make it visible). Enter after eachother DEV, TEST, PROD and a different response will be returned.

2.4 Deploy API and Create Stages
In this paragraph, you will create different stages for each alias. This way, it will be possible to make your API available at different URL’s for each alias.
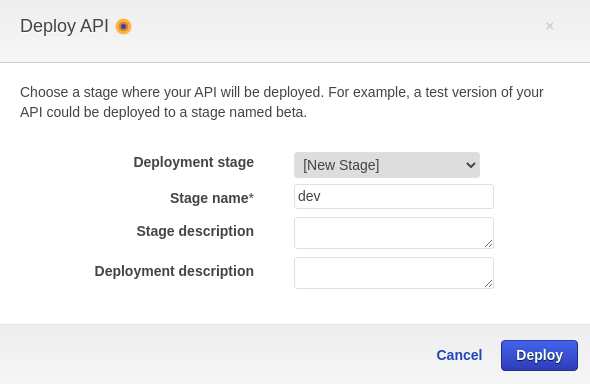
First step is to deploy the API so that it will become available to the outside world. In the Actions menu, choose Deploy API. Choose [New Stage] as Deployment stage and dev as Stage name. Click the Deploy button.
Navigate to the Stage Variables tab and add a stage variable lambdaAlias with value DEV.

Now you can access the GET method via the dev URL (do not forget to add the resource myjavalambda to the URL). As expected, “Version 3” is returned as a response.
$ curl https://irysdyxhm2.execute-api.eu-west-3.amazonaws.com/dev/myjavalambda
"Version 3"
Create stages for test and prod. Navigate in the left menu to the Stages page and click the Create button.

Give the Stage name the value test and choose the most recent deployment. Click the Create button.

Again, add the stage variable just like you did for the dev stage. Only the value will be TEST this time.
Finally, create a prod stage in a similar way.
2.5 Change Lambda Alias
When you change the version of a lambda alias, this change will be made visible immediately at the specified stage. Navigate to the lambda service to the lambda function. Change the version of the PROD alias to the version of the TEST alias and execute the prod URL. It returns “Version 2” instead of “Version 1”.
$ curl https://irysdyxhm2.execute-api.eu-west-3.amazonaws.com/prod/myjavalambda
"Version 2"
2.6 Change Response
API Gateway has a lot of features. One feature is to change the response received from the lambda function.
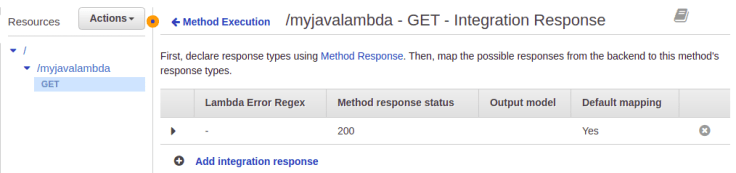
Click the Integration Response link in the GET – Method Execution screen (Resources section). Click the arrow in order to expand the first record.
In the Mapping Templates section, leave the Content-type to the default and click application/json link.

Choose Empty as Generate template and add the following in the text box.
#set($inputRoot = $input.path('$'))
{
    "newVersion": "$inputRoot"
}
This will only convert the returned text “Version 2” to a JSON response. Click the Save button.

Deploy the API to e.g. the prod stage and invoke the URL. This time, a JSON formatted response is returned. This could be a way to change the response when you are not able to change the response of the lambda itself or as a temporary quick fix.
$ curl https://irysdyxhm2.execute-api.eu-west-3.amazonaws.com/prod/myjavalambda
{
    "newVersion": "Version 2"
}
3. Secure API
In this section, authentication via Cognito will be added to the setup.
- A client first logs in via Cognito (a client login will be configured);
- After successful login, Cognito returns an
id_tokento the client; - The client sends a request to the API Gateway with the received
id_token; - The API Gateway verifies in Cognito whether the
id_tokenis valid; - Cognito will return to API Gateway a success response when the
id_tokenis valid; - The API Gateway sends the request to the lambda function;
- The lambda function executes and sends its response to the API Gateway;
- The API Gateway sends the response to the client.

3.1 Create Cognito User Pool
Navigate to the Cognito service and click Manage User Pools. In the next screen, click the Create a user pool button.

Enter the name MyFirstUserPool as Pool name and you will leave the default settings for now. Therefore, click the Review defaults link and in the next screen, click the Create pool button.

3.2 Create App Client
In the left menu, click App clients and click the Add an app client link.

Execute the following steps and at the end click the Create app client button:
- Disable Generate client secret
- In the Auth Flows Configuration section only enable Enable uername password based authentication

Navigate to the App client settings section in the left menu. Execute the following steps and click the Save changes button. Note that this might not be production ready settings, for more information see the official AWS documentation.
- Enable Cognito User Pool
- Enter a Callback URL, this will be necessary to retrieve the ID token
- Enable in the Allowed OAuth Flows the item Implicit grant
- Enable in the Allowed OAuth Scopes the openid item

Navigate to the Domain name section in the left menu. Choose a unique domain name (click the Check availability button in order to verify whether it is still available) and click the Save changes button.

3.3 Create User
You now have a UI available where you can create a user. Navigate in the left menu to App client settings, navigate to the bottom of the page and click the Launch Hosted UI link. A login screen is shown, click the Sign up link.

Fill in your user name, mail, password and click the Sign up button. Next, a mail is sent to you with a verification code which needs to be entered in the next popup in order to confirm the account.

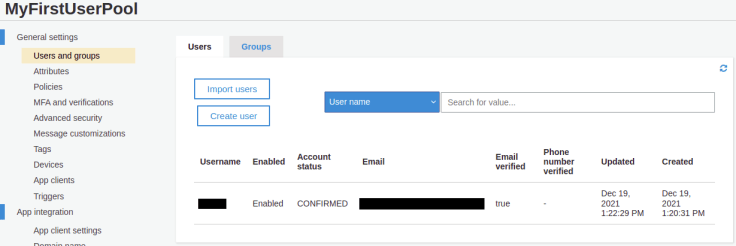
When you navigate to the Users and groups section in the left menu of the User Pool, you will notice that one user is created in this User Pool with status CONFIRMED.
3.4 Create Authorizer in API
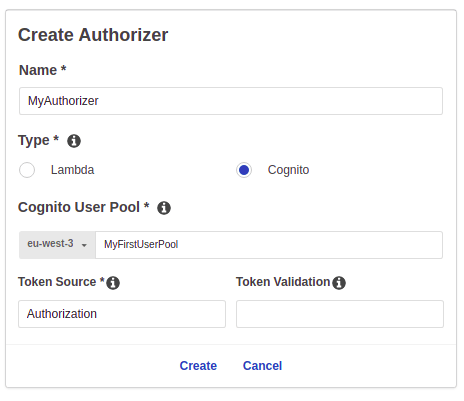
Navigate to the API Gateway service to your API. In the left menu choose Authorizers and click the Create New Authorizer button. Give it the name MyAuthorizer, choose Cognito as Type and select the Cognito User Pool MyFirstUserPool. Finally, choose the name Authorizaton for the header parameter which will contain the ID token. Click the Create button.
3.5 Add Authorizer to Request
In the API Gateway, navigate to the Resources section to the GET request and click the Method Request link. Choose MyAuthorizer as Authorization setting. If it is not available as an option to choose from, refresh the page first. And do not forget to click the v-icon, otherwise the change is not saved.

Finally, deploy the API to the dev stage.
3.6 Test the API
In order to test whether the configuration works, you are going to execute some steps.
First, navigate to the Cognito User Pool, choose in the left menu for App client settings, scroll down to the bottom of the page and click the Launch Hosted UI link. Sign in with the user you created.
You are redirected to the callback URL you configured and this URL now contains some extra parameters:
https://mydeveloperplanet.com/#id_token=<the ID token>&access_token=<the access token>&expires_in=3600&token_type=Bearer
Copy the value of the ID token.
Navigate to the API Gateway service to your API. Select the GET method of the dev stage in the Stages section. Here you will find the URL of the dev stage. Execute the following command where you replace <the ID token> with the token you copied and replace the URL with your own URL.
$ curl --header "Authorization: <the ID token>" https://irysdyxhm2.execute-api.eu-west-3.amazonaws.com/dev/myjavalambda
The response is a successful response of the dev environment:
{
    "newVersion": "Version 3"
}
Of course, the above manual actions done, are in real life executed by a client application.
When you have made a mistake with for example the ID token, the response will be an access denied message.
{"Message":"Access Denied"}
4. Conclusion
In this blog, you learned how to setup a basic API Gateway with authentication via a Cognito User Pool. It requires some effort to create the setup, but once this is done, a lot of functionality is available out-of-the-box.
Discover more from My Developer Planet
Subscribe to get the latest posts sent to your email.